When it comes to celebrations, few treats are as universally loved as birthday cake pops. These bite-sized delights pack the joy of a birthday cake into a fun, portable form. Whether you’re hosting a birthday party, looking for a creative dessert to add to a themed event, or simply satisfying a sweet tooth, cake pops are a perfect choice.
Imagine this: you’re hosting a birthday bash, the room filled with friends and family, and in the middle of it all, there’s a platter full of beautifully decorated birthday cake pops. They’re vibrant, fun, and easy to eat, with no need for plates or utensils. And the best part? You get to design them however you want, with different colors, flavors, and toppings that make your cake pops truly unique.
But don’t worry if you’re new to cake pops; this guide will walk you through every step of the process, from start to finish. Get ready to impress your guests with these fun and festive treats!
Table of Contents
What Are Birthday Cake Pops?
Cake pops are a modern twist on traditional birthday cake. Essentially, they’re cake balls that are mounted on sticks and coated in chocolate or candy melts. These little morsels of joy have become increasingly popular for their versatility and their ability to be personalized for any occasion. From classic birthday parties to themed events like weddings or holidays, cake pops can be decorated to match any theme.
Why Choose Cake Pops for a Birthday Party?
- Fun to Eat: Cake pops are easy to grab, so guests of all ages can enjoy them without the hassle of cutting a slice of cake.
- Minimal Cleanup: Since they’re individually wrapped in candy coating, cake pops are less messy than regular cakes or cupcakes.
- Customizable: You can experiment with flavors, colors, and designs to match the birthday theme—whether it’s a simple, classic look or something more extravagant.
Now that we know what cake pops are and why they make the perfect birthday treat, let’s dive into the step-by-step process of making them.
Ingredients You’ll Need for Birthday Cake Pops
Before diving into the process of making birthday cake pops, it’s important to gather all the necessary ingredients. While cake pops are simple to make, having the right tools and ingredients will ensure the process goes smoothly. Here’s a list of what you’ll need:
| Ingredient | Quantity |
|---|---|
| Vanilla Cake (homemade or store-bought) | 1 (9×13-inch) cake |
| Buttercream Frosting (or cream cheese frosting) | ½ cup (for binding the cake) |
| Candy Melts (variety of colors) | 2 cups (for coating) |
| Lollipop Sticks (6-inch or longer) | 20-25 sticks |
| Sprinkles or Decorative Toppings | As needed |
| Vegetable Oil (optional, for thinning the chocolate) | 1 tbsp (if needed) |
Pro Tip: You can opt for a store-bought cake mix and frosting to save time or go for homemade versions to make them extra special.
Step-by-Step Instructions for Making Birthday Cake Pops
Now that you have your ingredients ready, it’s time to start making your birthday cake pops. Follow these easy steps to ensure you create perfectly round, delicious cake pops every time.
Step 1: Bake & Crumble the Cake
Begin by baking your cake according to the recipe instructions, or if you’re using a boxed mix, follow the directions on the package. Let the cake cool completely on a wire rack. Cooling is important because warm cake will melt your frosting and affect the texture.
Once the cake has cooled, break it into large chunks and place it into a large mixing bowl. Use your hands or a fork to crumble it into fine, moist crumbs. Your goal is a soft, crumbly texture with no large chunks of cake remaining.
Step 2: Mix with Frosting
To bind the crumbs together, you’ll need to add frosting. Start with about ½ cup of frosting, and mix it in with the cake crumbs. You can use a spoon, but using your hands is the easiest way to get the perfect consistency.
The mixture should hold together when pressed but shouldn’t be too wet or sticky. Add frosting a little at a time until the mixture has a dough-like consistency. Too much frosting will make the cake pops soggy, so go slow with this step.
Step 3: Roll into Balls
Using your hands, scoop out small portions of the cake mixture and roll them into 1-inch balls. It’s important to make sure the balls are even in size so that they cook uniformly when dipped.
If the mixture is too sticky to handle, you can refrigerate it for about 15 minutes to firm it up. This step will help the cake balls keep their shape as you dip them in chocolate.
Step 4: Insert Lollipop Sticks
Melt a small amount of candy melts or chocolate in a microwave-safe bowl. Dip the tip of each lollipop stick into the melted chocolate before inserting it into the cake ball. This will help the stick adhere better to the cake and prevent it from sliding out later.
Insert the stick about halfway into the cake ball and place it on a parchment paper-lined baking sheet. Repeat with the remaining cake balls.
Step 5: Coat the Cake Pops
Once all the cake pops have their sticks inserted, it’s time to dip them in melted candy melts or chocolate. Melt the candy melts according to the package directions, stirring every 20 seconds to ensure smoothness.
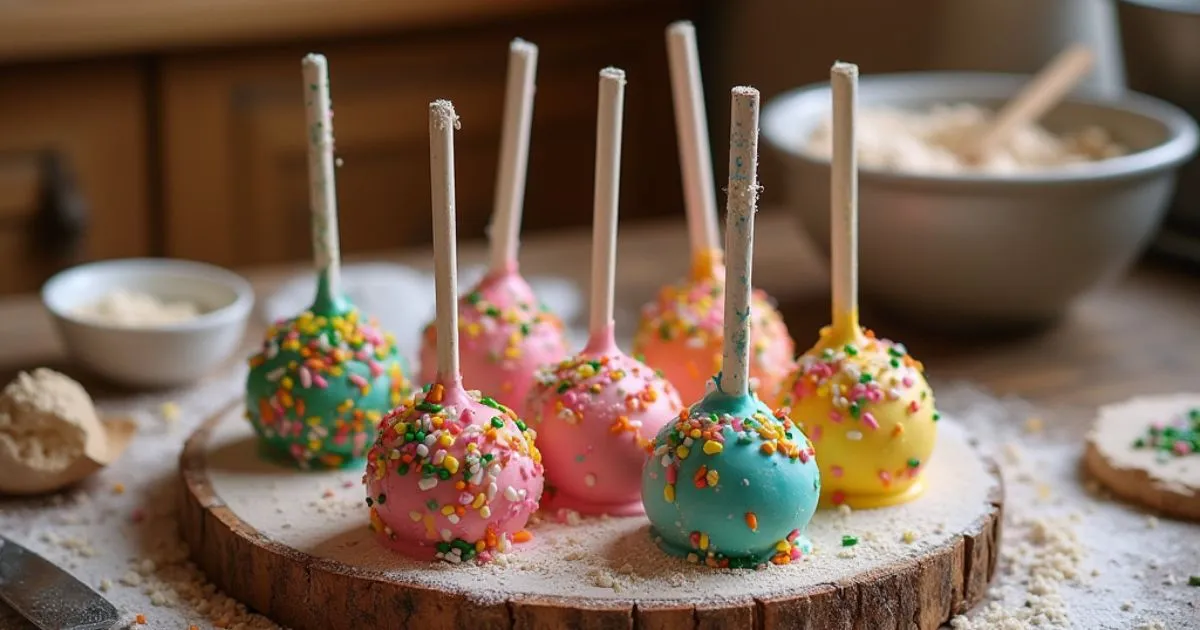
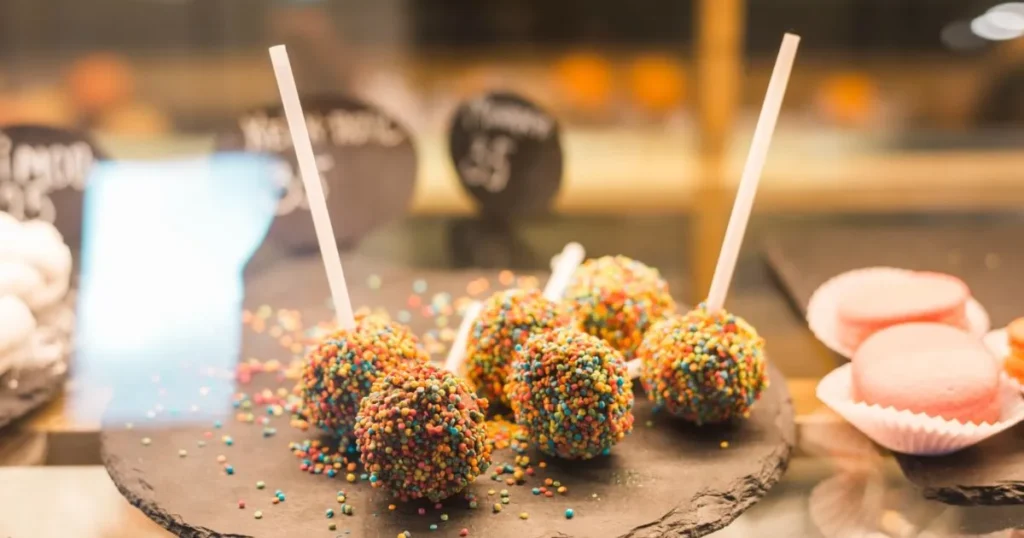
Hold the cake pop by the stick and dip it into the melted chocolate, coating it completely. Let the excess chocolate drip off, then decorate the cake pop immediately with sprinkles, edible glitter, or other decorations.
Step 6: Let Them Set & Enjoy!
Place the cake pops in a cake pop stand or a piece of styrofoam to let them set. This will ensure the coating hardens around the cake pop. It should take about 30 minutes for the candy coating to fully dry.
Once set, your birthday cake pops are ready to serve and enjoy!
Creative Decorating Ideas for Birthday Cake Pops
One of the best things about birthday cake pops is how customizable they are. You can experiment with different flavors, colors, and toppings to match the birthday theme. Here are a few creative decorating ideas to help you elevate your cake pops:
Themed Cake Pops
- Unicorn Cake Pops: Use pastel-colored candy melts like pink, purple, and blue. Add sprinkles, edible glitter, and even mini unicorn horns made of fondant for a magical touch.
- Sports-Themed Cake Pops: For a sports birthday, you can decorate your cake pops to look like basketballs, footballs, or soccer balls.
- Rainbow Cake Pops: For a vibrant look, use rainbow-colored candy melts. You can also incorporate different cake flavors to match the rainbow theme.
Decorative Techniques
- Drizzle Effect: Use a contrasting color to drizzle over the cake pops. This technique creates a beautiful effect and adds visual interest.
- Marble Effect: You can swirl two or more colors of candy melts together to create a marble effect that looks stunning.
- Edible Gold or Silver Leaf: For a more elegant or luxurious touch, add edible gold or silver leaf on top of your cake pops.
Alternative Cake Pop Flavors
- Chocolate Cake with Peanut Butter Frosting: A rich, decadent chocolate cake paired with creamy peanut butter frosting makes for a delicious and unique flavor combo.
- Red Velvet Cake Pops: Red velvet cake with cream cheese frosting is a classic choice for a more sophisticated treat.
- Lemon Cake with White Chocolate Coating: A fresh, tangy lemon cake with a smooth white chocolate coating can add a refreshing twist to your cake pop selection.
Tips & Tricks for Perfect Cake Pops Every Time
While cake pops are simple to make, there are a few tips and tricks that can help ensure your cake pops turn out perfectly every time.
How to Prevent Cake Pops from Cracking
- Avoid Overheating the Coating: Always melt the candy melts or chocolate in short intervals, stirring every 20 seconds. Overheating the coating can cause cracks to form on your cake pops.
- Chill Before Dipping: Chill your cake pops in the refrigerator for about 15 minutes before dipping them into the melted candy melts. This helps keep the cake ball firm and prevents cracks.
How to Keep Cake Pops from Falling Off the Stick
To ensure the stick stays securely in place:
- Dip the Stick in Chocolate First: As mentioned earlier, dipping the lollipop stick in melted chocolate before inserting it into the cake ball will help hold it in place.
- Use Fresh Cake: If you use cake that’s been sitting for a while, it might be too dry and crumbly. Fresh cake will bind better with the frosting, preventing the stick from sliding out.
Storage & Make-Ahead Tips
- How to Store Cake Pops: Cake pops can be stored in an airtight container at room temperature for up to 3 days. If you want to keep them longer, refrigerate them for up to a week or freeze them for up to two months.
- Freezing Cake Pops: If you plan to freeze your cake pops, wrap each one individually in plastic wrap and place them in an airtight container. Thaw them at room temperature before serving
.
Conclusion
Birthday cake pops are the perfect combination of fun, flavor, and creativity. Not only are they easy to make, but they can be customized to match any theme or personal style. Whether you’re hosting a large birthday bash or a small gathering, cake pops are a guaranteed crowd-pleaser.
Now that you have the step-by-step guide, along with expert tips and creative decorating ideas, you’re ready to create your own delicious cake pops. Experiment with different flavors, colors, and toppings to make your cake pops as unique as the birthday person. Remember, the best part about these treats is how you can make them your own!
So, what are you waiting for? Grab your ingredients, get baking, and bring some cake pop magic to your next celebration. Happy baking!
Call to Action: Ready to take your cake pop game to the next level? Try out one of the decorating ideas we shared, and don’t forget to share your creations with us on social media! Tag us to show off your festive birthday cake pops!
There you go—a comprehensive, detailed article on birthday cake pops! Let me know if you’d like any more adjustments.