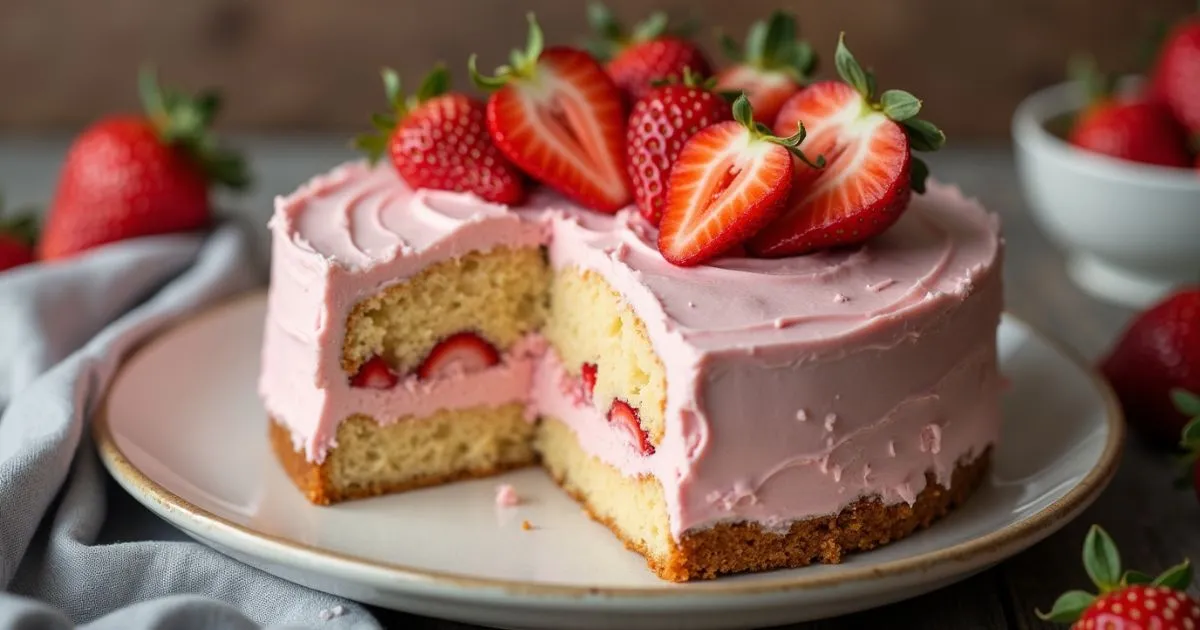
Nothing captures the essence of a celebration quite like a homemade cake, and if you’re a fan of rich, creamy cheesecake and fluffy, fruity cakes, then this strawberry cheesecake cake is the perfect dessert for you. Imagine biting into layers of soft, moist strawberry cake, a luscious cheesecake center, and a silky strawberry frosting—all in one bite. This recipe is not just about baking; it’s about creating an experience that brings joy to every occasion.
I still remember the first time I made this cake for a family gathering. The aroma of fresh strawberries filled the kitchen, and as I layered the creamy cheesecake between the delicate cake rounds, I couldn’t wait to see everyone’s reaction. When I finally sliced into it, the layers were picture-perfect, and the combination of textures was heavenly. It instantly became a family favorite, and now, every special occasion calls for this indulgent treat.
Whether you’re celebrating a birthday, an anniversary, or simply craving a decadent homemade dessert, this easy strawberry cheesecake cake recipe is sure to impress. Best of all, it’s simpler to make than you might think! With step-by-step instructions and helpful tips, you’ll be able to recreate this bakery-quality cake in your own kitchen.
Now, let’s dive into everything you need to know to make this strawberry cheesecake cake—from selecting the right ingredients to assembling and decorating your masterpiece.
Table of Contents
What is a Strawberry Cheesecake Cake?
A strawberry cheesecake cake is the ultimate dessert mashup, combining two classic favorites: a moist strawberry cake and a creamy cheesecake layer, all topped with a luscious strawberry frosting. Unlike a traditional cheesecake or a standard layer cake, this recipe blends the best of both worlds, delivering a unique texture and flavor experience in every bite.
What Makes It Special?
- Dual Textures – The contrast between the light, fluffy strawberry cake and the rich, velvety cheesecake creates an irresistible combination.
- Fresh Strawberry Flavor – Unlike artificial strawberry cakes, this version is made with real strawberry puree for an authentic, fruity taste.
- Perfect for Any Occasion – Whether it’s a birthday, anniversary, or holiday gathering, this cake is guaranteed to be a showstopper.
How is It Different from Regular Cheesecake or Cake?
| Feature | Strawberry Cheesecake Cake | Traditional Cheesecake | Regular Strawberry Cake |
|---|---|---|---|
| Layers | 2 strawberry cake layers + 1 cheesecake layer | Single cheesecake layer with a crust | 2 or more cake layers with frosting |
| Texture | Soft cake with creamy cheesecake center | Dense and creamy | Light and fluffy |
| Frosting | Strawberry buttercream or whipped frosting | Often a fruit topping or sour cream layer | Buttercream or whipped cream |
| Serving Temperature | Best chilled but not as cold as cheesecake | Served fully chilled | Served at room temperature |
Why You’ll Love This Recipe
- The balance of sweetness and tanginess keeps it from being overwhelming.
- It’s a great make-ahead dessert because the cheesecake can be prepared in advance.
- It’s customizable—you can swap out strawberries for raspberries, blueberries, or even chocolate.
This cake is more than just a dessert—it’s an experience. The blend of creamy cheesecake, soft cake, and fresh strawberry frosting makes every slice a delight. Now that you know what makes this cake so special, let’s dive into the ingredients you’ll need to bring it to life.
Ingredients for Strawberry Cheesecake Cake

The secret to a perfect strawberry cheesecake cake lies in using high-quality ingredients that enhance both flavor and texture. This recipe consists of three main components:
- Strawberry Cake Layers – A soft and fluffy cake infused with fresh strawberry puree for a natural fruity flavor.
- Cheesecake Layer – A rich, creamy, and slightly tangy cheesecake that balances the sweetness of the cake.
- Strawberry Frosting – A smooth and velvety buttercream made with real strawberries for an extra burst of flavor.
Each layer complements the others, creating a well-balanced and irresistible dessert. Let’s break down the ingredients needed for each part.
Strawberry Cake Layers
The base of this cake is a moist and flavorful strawberry cake. Instead of relying on artificial strawberry flavoring or boxed cake mix, we use fresh strawberry puree, which enhances the cake’s natural sweetness and gives it a soft pink hue.
| Ingredient | Quantity | Purpose |
|---|---|---|
| All-purpose flour | 2 ½ cups | Provides structure to the cake |
| Baking powder | 2 tsp | Helps the cake rise and stay fluffy |
| Granulated sugar | 1 ¾ cups | Adds sweetness and moisture |
| Unsalted butter | ½ cup (softened) | Adds richness and enhances texture |
| Eggs | 4 | Provide structure and moisture |
| Milk | 1 cup | Adds moisture and keeps the cake soft |
| Vanilla extract | 1 tsp | Enhances the overall flavor |
| Fresh strawberries (pureed) | ¾ cup | Infuses natural strawberry flavor |
| Strawberry extract (optional) | 1 tsp | Intensifies the strawberry taste |
Ingredient Notes & Tips
- Fresh strawberries vs. frozen: Fresh strawberries are ideal, but if using frozen, thaw and drain excess liquid before pureeing.
- Strawberry extract: If you want a stronger strawberry flavor, adding a teaspoon of strawberry extract can enhance the taste.
- Room temperature ingredients: Ensure eggs, butter, and milk are at room temperature for a smooth batter.
Cheesecake Layer
This layer is inspired by a classic New York-style cheesecake, but slightly lighter to complement the cake. It provides a creamy, slightly tangy contrast to the sweetness of the strawberry cake.
| Ingredient | Quantity | Purpose |
|---|---|---|
| Cream cheese | 16 oz (softened) | The key ingredient for a rich and creamy texture |
| Granulated sugar | ½ cup | Adds sweetness and balances the tanginess |
| Eggs | 2 | Help bind the cheesecake together |
| Vanilla extract | 1 tsp | Adds depth of flavor |
Ingredient Notes & Tips
- Use full-fat cream cheese: This ensures a rich and creamy texture. Avoid low-fat varieties as they can be too watery.
- Avoid overmixing: Overmixing the batter can introduce too much air, leading to cracks in the cheesecake.
- Chilling time: The cheesecake should be made in advance and chilled for at least 4 hours or overnight for best results.
Strawberry Frosting
A homemade strawberry buttercream frosting adds the finishing touch, bringing everything together with its smooth texture and fresh strawberry flavor.
| Ingredient | Quantity | Purpose |
|---|---|---|
| Unsalted butter | 1 cup (softened) | Creates a smooth and creamy base |
| Powdered sugar | 4 cups | Sweetens and thickens the frosting |
| Fresh strawberries (pureed and strained) | ¼ cup | Infuses natural strawberry flavor and color |
| Vanilla extract | 1 tsp | Enhances the overall taste |
Ingredient Notes & Tips
- Straining the strawberry puree: To avoid a runny frosting, strain out excess liquid from the pureed strawberries before adding them.
- Adjust the consistency: If the frosting is too thin, gradually mix in more powdered sugar. If too thick, add a teaspoon of milk.
- Chilling before frosting: Let the cake cool completely before frosting to prevent melting.
Optional Garnishes
For an extra special touch, consider adding some garnishes:
- Fresh strawberries – Whole or sliced for decoration.
- White chocolate shavings – Adds a sweet and elegant finish.
- Strawberry syrup drizzle – Enhances the fruity flavor.
- Whipped cream – Lightens the texture and adds extra creaminess.
Why These Ingredients Work Together
- The strawberry cake provides a light and airy base.
- The cheesecake layer adds creaminess and balances the sweetness.
- The strawberry frosting ties everything together with its smooth, fruity finish.
Now that you have all the ingredients ready, let’s move on to the step-by-step instructions for bringing this strawberry cheesecake cake to life!
Step-by-Step Instructions
Making a strawberry cheesecake cake may seem like a challenge, but by following these simple steps, you’ll be able to create a stunning and delicious dessert. This process is broken down into five key steps: baking the cheesecake layer, preparing the strawberry cake layers, making the frosting, assembling the cake, and decorating it for a beautiful final presentation.
Each step requires patience and precision, but the reward is a perfect balance of creamy cheesecake, fluffy cake, and luscious strawberry frosting. Let’s get started!
Step 1: Preparing the Cheesecake Layer
The cheesecake layer is the heart of this cake, providing a smooth, creamy contrast to the light strawberry cake layers. Since the cheesecake requires time to cool and set, it’s best to prepare it first.
Instructions:
- Preheat the oven to 325°F (163°C) and grease a 9-inch springform pan with nonstick spray or butter.
- In a large bowl, beat cream cheese and granulated sugar using an electric mixer until smooth and creamy.
- Add the eggs one at a time, mixing on low speed until fully combined. d. Avoid overmixing to prevent air bubbles that could cause cracking.
- Stir in vanilla extract and mix until incorporated.
- Pour the batter into the prepared pan and tap the pan gently on the counter to remove any air bubbles.
- Bake for 30–35 minutes, or until the center is firm and the edges turn lightly golden.
- Turn off the oven and leave the cheesecake inside with the door slightly open for about 10 minutes to cool gradually. This helps prevent cracks.
- Transfer to a cooling rack and let it cool to room temperature, then refrigerate for at least 4 hours or overnight for best results.
Tips for Success:
- For a perfectly smooth cheesecake, ensure all ingredients are at room temperature before mixing.
- If your cheesecake cracks, don’t worry! The frosting will cover any imperfections.
- Let the cheesecake fully chill before assembling the cake to maintain its firm texture.
Step 2: Baking the Strawberry Cake Layers
Now that the cheesecake layer is chilling, it’s time to prepare the strawberry cake. This cake is naturally flavored with fresh strawberry puree for a rich, fruity taste.
Instructions:
- Preheat the oven to 350°F (177°C). Grease and line two 9-inch cake pans with parchment paper to ensure the cake doesn’t stick.
- In a medium bowl, whisk together the flour, baking powder, and salt, then set it aside.
- In a large mixing bowl, beat the butter and granulated sugar on medium speed for 2–3 minutes until light and fluffy.
- Add the eggs one at a time, making sure to beat well after each addition.
- Mix in vanilla extract and strawberry puree. If you’re using strawberry extract, add it now to enhance the flavor.
- Slowly incorporate the dry ingredients into the wet ingredients, alternating with milk, starting and finishing with the dry mixture. Mix until just combined.
- Evenly divide the batter between the two prepared cake pans.
- Bake for 25–30 minutes, or until a toothpick inserted into the center comes out clean.
- Let the cakes rest in the pans for 10 minutes, then transfer them to a wire rack to cool completely.
Tips for Success:
- Measure the strawberry puree carefully, as too much liquid can make the cake dense.
- Wrap cake strips around the pans to ensure even baking and prevent doming.
- Avoid overmixing the batter, as it may result in a dense texture.
Step 3: Making the Strawberry Frosting
This strawberry buttercream frosting is light, creamy, and packed with fresh strawberry flavor. It’s the perfect finishing touch for your cake.
Instructions:
- In a large bowl, beat the butter on medium speed for about 2 minutes until smooth and creamy.
- Gradually add the powdered sugar, one cup at a time, ensuring it’s well mixed after each addition.
- Mix in strained strawberry puree and vanilla extract, beating until well combined.
- If the frosting is too thick, add milk one teaspoon at a time until it reaches the desired consistency. If too thin, add more powdered sugar.
- Once the frosting is smooth and fluffy, set it aside until ready to assemble the cake.
Tips for Success:
- Strain the strawberry puree before mixing it into the frosting to remove excess liquid and prevent it from becoming too runny.
- If the frosting becomes too soft, refrigerate it for 10–15 minutes before frosting the cake.
- For an extra smooth finish, beat the frosting on high speed for an additional minute to make it light and airy.
Step 4: Assembling the Strawberry Cheesecake Cake
Now that all the components are ready, it’s time to bring them together into one showstopping dessert.
Instructions:
- Trim the cake layers if necessary to ensure they are level. A serrated knife or cake leveler works best for this.
- Place one strawberry cake layer on a serving plate or cake stand.
- Carefully remove the chilled cheesecake layer from the springform pan and place it on top of the cake layer.
- Place the second strawberry cake layer on top of the cheesecake.
- Apply a thin crumb coat (a light layer of frosting) to trap any loose crumbs, then refrigerate the cake for 15–20 minutes.
- Frost the cake evenly with the strawberry buttercream, using an offset spatula for smooth coverage.
Tips for Success:
- Use a cake turntable for easier frosting application.
- Refrigerate the cake after assembling to help it set before slicing.
- If you prefer a naked cake look, apply only a thin layer of frosting, allowing some of the cake to peek through.
Step 5: Decorating & Serving
The final step is adding beautiful finishing touches to make your cake look as good as it tastes.
Decoration Ideas:
- Fresh strawberries – Arrange whole or sliced strawberries on top.
- White chocolate shavings – Sprinkle over the frosting for an elegant touch.
- Strawberry syrup drizzle – Adds extra strawberry flavor and a glossy finish.
- Whipped cream rosettes – Pipe around the edges for a bakery-style look.
Serving Suggestions:
- Allow the cake to chill for at least 30 minutes before slicing to keep the layers intact.
- Use a sharp knife dipped in warm water for clean, smooth slices.
- Serve with a scoop of vanilla ice cream or a dollop of whipped cream for an extra treat.
Now that your strawberry cheesecake cake is ready, get ready to impress your family and friends with this stunning and delicious homemade dessert!
Tips for the Best Strawberry Cheesecake Cake
Creating the perfect strawberry cheesecake cake requires attention to detail and a few expert tips to ensure the best texture, flavor, and presentation. From selecting the right ingredients to troubleshooting common baking issues, these tips will help you achieve a flawless cake every time.
1. Use Fresh, High-Quality Ingredients
The quality of your ingredients plays a major role in how your cake turns out.
- Fresh strawberries: Use ripe, sweet strawberries for the best natural flavor. If using frozen strawberries, thaw and drain them thoroughly to avoid excess moisture.
- Full-fat cream cheese: This ensures a rich and creamy cheesecake layer. Low-fat versions contain more water and can make the texture grainy.
- Unsalted butter: Using unsalted butter gives you control over the salt content in your cake and frosting.
- Pure vanilla extract: Adds depth of flavor—avoid artificial vanilla for the best results.
2. Ensure Proper Cheesecake Texture
A smooth, crack-free cheesecake layer is key to a beautiful cake.
- Room temperature ingredients: Bring cream cheese, eggs, and vanilla extract to room temperature before mixing to create a lump-free batter.
- Avoid overmixing: Overmixing incorporates too much air, which can cause cracks when baking.
- Bake at a lower temperature: A gentle bake at 325°F (163°C) helps prevent the cheesecake from becoming too dry or cracking.
- Chill thoroughly: The cheesecake must be fully chilled (at least 4 hours or overnight) before assembly to maintain its firmness.
3. Achieve a Light and Fluffy Strawberry Cake
A moist, tender cake is essential for balancing the creamy cheesecake layer.
- Measure ingredients accurately: Use a kitchen scale or spoon-and-level method for dry ingredients to avoid a dense cake.
- Alternate wet and dry ingredients: When mixing the batter, alternate adding flour and milk to prevent overdeveloping the gluten, which can make the cake tough.
- Don’t overbake: Check for doneness by inserting a toothpick into the center. If it comes out clean or with a few moist crumbs, the cake is done.
- Let the cake cool completely: Warm cake layers can melt the cheesecake and frosting, so be patient!
4. Make the Perfect Strawberry Frosting
A smooth, stable frosting ties everything together, so follow these key tips:
- Strain the strawberry puree: Removing excess liquid prevents the frosting from becoming runny.
- Use cold butter: If your frosting gets too soft, refrigerate it for 10–15 minutes before using.
- Beat until fluffy: Whipping the buttercream for a few extra minutes adds lightness and makes it easier to spread.
5. Assemble the Cake Properly
Layering the cake correctly ensures stability and a visually appealing presentation.
- Trim the cake layers: If your cakes have domed tops, level them with a serrated knife to create even layers.
- Chill before frosting: Applying a crumb coat and chilling the cake for 15–20 minutes helps keep everything firm and easier to decorate.
- Use a cake turntable: This makes spreading the frosting evenly much easier.
6. Storage and Make-Ahead Tips
This cake is best served chilled, but here’s how to store it properly:
- Refrigerate: Keep the cake in an airtight container in the fridge for up to 4 days.
- Freeze the cheesecake layer: The cheesecake can be made ahead and frozen for up to a month. Wrap it tightly in plastic wrap and thaw in the fridge before assembling.
- Freeze the whole cake: If freezing, wrap the entire assembled cake (without fresh strawberries on top) in plastic wrap and foil. Thaw overnight in the fridge before serving.
7. Common Troubleshooting Solutions
| Issue | Possible Cause | Solution |
|---|---|---|
| Cheesecake cracked | Overmixed batter or overbaked | Don’t overmix, bake at a lower temp, and cool gradually |
| Cake is too dense | Overmixed batter or too much flour | Mix gently and measure ingredients correctly |
| Frosting is runny | Too much strawberry puree | Strain the puree and add more powdered sugar if needed |
| Layers are sliding | Assembled while warm | Chill the cake before frosting and in between steps |
Storage & Make-Ahead Instructions
A strawberry cheesecake cake is a dessert that requires careful storage to maintain its freshness, texture, and flavor. Since this cake contains both a cheesecake and a buttercream frosting, it must be stored properly to prevent it from drying out or becoming too soft. Additionally, if you want to prepare components in advance, there are several ways to make ahead and freeze different parts of the cake for easier assembly.
Below are detailed storage and make-ahead instructions to help you enjoy your cake at its best, whether you plan to serve it immediately or save it for later.
How to Store Strawberry Cheesecake Cake
Since this cake has a cream cheese-based layer and a butter-based frosting, it should always be kept refrigerated when not being served. Here’s how to store it properly:
Short-Term Storage (Up to 4 Days in the Refrigerator)
- Cover the cake tightly with plastic wrap or store it in an airtight cake container to prevent it from absorbing fridge odors.
- Place the cake in the refrigerator and keep it at a consistent, cool temperature (below 40°F or 4°C).
- When ready to serve, allow the cake to sit at room temperature for 10–15 minutes to soften slightly before slicing.
Tip: If you plan to serve only a few slices at a time, cut individual pieces and store them separately in airtight containers to maintain freshness.
Can You Leave It at Room Temperature?
- Because of the cheesecake layer and buttercream frosting, this cake should not be left at room temperature for more than 2 hours.
- If serving the cake at a gathering, keep it chilled until just before serving to maintain its shape and texture.
Freezing the Cake for Longer Storage
If you want to store the cake for more than 4 days, freezing is the best option. This method is great for making the cake in advance for special occasions.
How to Freeze the Fully Assembled Cake (Up to 2 Months)
- Place the cake in the freezer uncovered for about 1 hour to allow the frosting to firm up.
- Wrap the entire cake tightly in plastic wrap, followed by a layer of aluminum foil to prevent freezer burn.
- Label the package with the freezing date and store it in the freezer for up to 2 months.
- When ready to serve, thaw the cake overnight in the refrigerator, then let it sit at room temperature for 15 minutes before slicing.
Tip: Avoid adding fresh strawberry decorations before freezing, as they can become soggy. Instead, decorate the cake after thawing.
How to Freeze Individual Slices
If you want to freeze leftovers or enjoy small portions later, freezing individual slices is a great option:
- Place slices on a baking sheet lined with parchment paper and freeze for 1 hour.
- Wrap each slice tightly in plastic wrap, then place them in a freezer-safe container or resealable bag.
- Thaw individual slices in the refrigerator for a few hours or at room temperature for 30 minutes before serving.
Make-Ahead Instructions
If you’d like to prepare the components of your strawberry cheesecake cake in advance to save time, here’s the best way to do it:
Make-Ahead Cheesecake Layer (Up to 1 Month in Advance)
- Bake the cheesecake as directed and allow it to cool completely.
- Once cooled, wrap it tightly in plastic wrap followed by aluminum foil.
- Freeze for up to 1 month.
- When ready to use, thaw overnight in the refrigerator before assembling the cake.
Make-Ahead Strawberry Cake Layers (Up to 1 Month in Advance)
- Bake the cake layers as instructed and let them cool completely.
- Wrap each layer separately in plastic wrap, then in aluminum foil.
- Store in the freezer for up to 1 month.
- Thaw in the refrigerator overnight before assembling.
Make-Ahead Frosting (Up to 1 Week in Advance)
- Prepare the strawberry buttercream as instructed.
- Transfer it to an airtight container and store it in the refrigerator for up to 1 week.
- Before using, let it sit at room temperature for 15–20 minutes and re-whip with a mixer to restore its creamy texture.
Best Practices for Storing & Making Ahead
| Component | Fridge Storage | Freezer Storage | Thawing Instructions |
|---|---|---|---|
| Fully Assembled Cake | 4 days | 2 months | Thaw overnight in the fridge, then sit at room temp for 15 min |
| Cheesecake Layer | 4 days | 1 month | Thaw overnight in the fridge |
| Strawberry Cake Layers | 4 days | 1 month | Thaw overnight in the fridge |
| Strawberry Frosting | 1 week | Not recommended | Let sit at room temp for 15 min, then re-whip |
| Individual Slices | 4 days | 2 months | Thaw in the fridge for a few hours or at room temp for 30 min |
Frequently Asked Questions (FAQs)
Making a strawberry cheesecake cake can bring up some common questions, especially when it comes to baking, storage, and substitutions. Below, we’ve answered the most frequently asked questions to help ensure your cake turns out perfect every time!
1. Can I Use Frozen Strawberries Instead of Fresh?
Yes, you can use frozen strawberries, but there are a few important considerations:
- Thaw and drain well: Frozen strawberries contain excess water, which can make the cake batter too wet or cause the frosting to become runny. After thawing, pat them dry with paper towels.
- Use for puree or compote: Frozen strawberries work best in the strawberry puree for the frosting or in a strawberry compote filling.
- Not ideal for decoration: Since frozen strawberries soften as they thaw, they aren’t the best choice for garnishing the cake. Use fresh strawberries for the final topping.
2. Can I Make This Cake Gluten-Free?
Absolutely! You can make a gluten-free strawberry cheesecake cake by making a few adjustments:
- Use a gluten-free flour blend: Choose a 1:1 gluten-free flour replacement that contains xanthan gum, which helps mimic the texture of regular flour.
- Check all ingredients: Some baking powders and flavor extracts may contain gluten, so always check labels.
- Adjust baking time: Gluten-free cakes sometimes bake differently, so check for doneness a few minutes early and use the toothpick test to ensure it’s fully baked.
3. Why Did My Cheesecake Crack?
Cracks in cheesecake can happen for a few reasons, but they are usually avoidable. Here’s what might have gone wrong:
- Overmixing the batter: Too much air in the batter can cause cracks when baking. Mix until just combined.
- Baking at too high a temperature: Cheesecake bakes best at 325°F (163°C). A higher temperature can cause it to bake too quickly and crack.
- Not using a water bath: While not required, a water bath helps regulate the baking temperature and prevents sudden temperature changes that cause cracks.
- Sudden cooling: A rapid temperature drop can cause cracks. Let the cheesecake cool gradually by turning off the oven and leaving the door slightly open for 30 minutes before removing it.
Tip: Even if your cheesecake cracks, it won’t affect the taste! Once the cake is assembled and frosted, no one will notice.
4. How Long Should I Chill the Cake Before Serving?
For the best texture and flavor, follow these chilling guidelines:
- Cheesecake layer: Chill for at least 4 hours (preferably overnight) before assembling the cake.
- Assembled cake: Once fully frosted and decorated, refrigerate the cake for at least 1 hour before serving. This helps the layers firm up and makes slicing easier.
- Before serving: Let the cake sit at room temperature for 10–15 minutes to slightly soften the frosting and enhance the flavor.
5. Can I Make This Cake Without a Stand Mixer?
Yes, you can make this cake without a stand mixer! Here’s how:
- Hand Mixer: A hand mixer works just as well for mixing the cake batter, cheesecake filling, and frosting. Use medium speed and scrape down the bowl frequently.
- Whisk and Spatula: If you don’t have an electric mixer, you can mix the cake batter and cheesecake filling by hand. Use a whisk to combine ingredients until smooth, and a spatula to gently fold in dry ingredients.
- Buttercream Frosting: Since frosting requires a lot of whipping to achieve the right texture, a hand mixer is highly recommended for this step.
Conclusion
Making a strawberry cheesecake cake may take a little extra effort, but the result is a stunning, decadent dessert that’s perfect for any special occasion. With its layers of moist strawberry cake, creamy cheesecake, and luscious strawberry buttercream, this cake offers a delightful balance of flavors and textures.
By following the step-by-step instructions, using high-quality ingredients, and implementing the expert tips provided, you can ensure a flawless cake every time. Whether you’re baking for a birthday, holiday, or simply indulging in a homemade treat, this recipe is sure to impress family and friends.
Remember, you can prepare components ahead of time to make the process easier, and proper storage techniques will help keep your cake fresh. If you encounter any challenges along the way, refer to the FAQs for troubleshooting solutions.
Now it’s time to put on your apron, gather your ingredients, and enjoy baking this easy and delicious strawberry cheesecake cake! Happy baking!