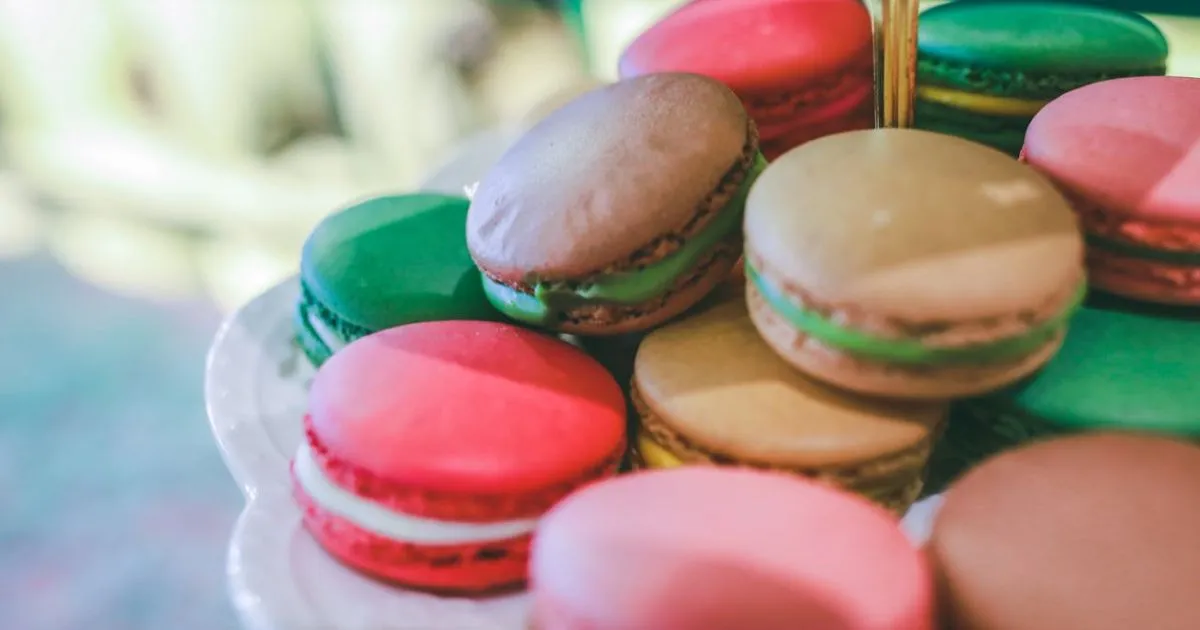
There’s something magical about baking cookies, especially when they burst with vibrant colors. The simple act of mixing dough, adding bright hues, and watching them transform in the oven brings a sense of joy and creativity to any kitchen. Whether you’re making them for a birthday party, holiday celebration, or just as a fun weekend project, colorful cookies have a way of brightening up any occasion.
Beyond just their visual appeal, these cookies can be a fun activity for both kids and adults. The process allows you to experiment with different colors, patterns, and designs—whether you’re creating a rainbow swirl, an ombre effect, or a playful marbled look. And the best part? They taste just as delicious as they look!
In this guide, you’ll learn everything you need to know about making colorful cookies at home, from choosing the right ingredients to mastering the techniques that ensure the perfect bake. Whether you’re a beginner or a seasoned baker, these step-by-step instructions and pro tips will help you achieve bakery-quality results with ease. So, preheat your oven, grab your mixing bowls, and let’s get started on this colorful baking adventure!
Table of Contents
Ingredients for Colorful Cookies
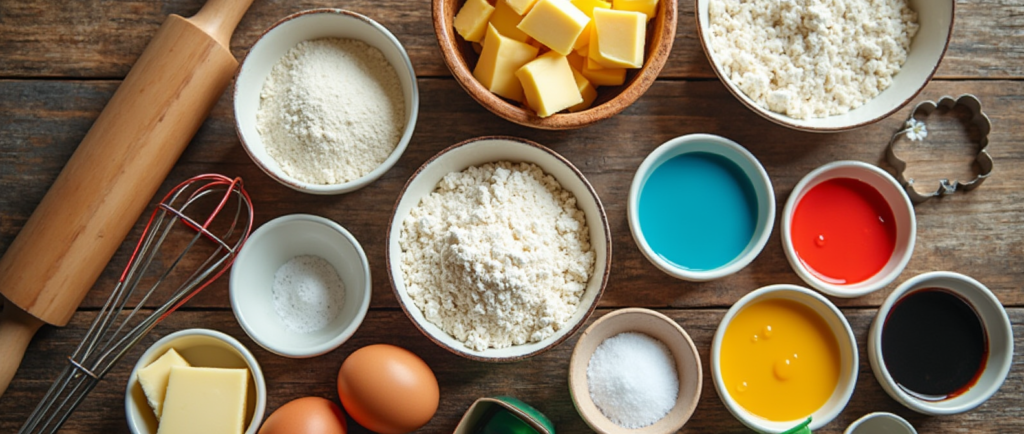
Before you start mixing and baking, having the right ingredients is essential to ensure your cookies turn out soft, flavorful, and vibrantly colored. The foundation of colorful cookies is a classic sugar cookie dough, which is easy to work with and holds its shape well when baked. This dough provides a neutral canvas, allowing the colors to pop beautifully.
Choosing the Right Ingredients
Each ingredient in the cookie dough plays an important role in creating the perfect texture and taste:
- Flour: All-purpose flour gives the cookies structure, preventing them from spreading too much while baking.
- Butter: Using unsalted butter ensures you can control the salt content in the recipe. Softened butter helps create a smooth dough and gives cookies a rich, buttery flavor.
- Sugar: A mix of granulated and brown sugar provides the right balance of sweetness and chewiness. Granulated sugar adds crispness, while brown sugar retains moisture.
- Eggs: These act as a binding agent, giving the cookies structure and helping them stay soft.
- Vanilla Extract: Adds depth of flavor and enhances the sweetness of the dough.
- Baking Powder: A leavening agent that helps the cookies rise slightly while maintaining their shape.
- Salt: Balances the sweetness and enhances the overall flavor.
- Food Coloring: The key to making these cookies visually stunning! Gel food coloring is recommended over liquid food coloring, as it provides more intense color without altering the dough’s consistency.
- Sprinkles (Optional): If you want to add extra fun and texture, colorful sprinkles can be mixed into the dough or used as decoration before baking.
Basic Cookie Dough Ingredients
| Ingredient | Quantity |
|---|---|
| All-purpose flour | 2 ½ cups |
| Unsalted butter (softened) | 1 cup |
| Granulated sugar | 1 cup |
| Brown sugar | ½ cup |
| Eggs | 2 |
| Vanilla extract | 2 tsp |
| Baking powder | 1 tsp |
| Salt | ½ tsp |
| Food coloring (various colors) | As needed |
| Sprinkles (optional) | As needed |
By carefully measuring and selecting high-quality ingredients, you ensure that your cookies not only look amazing but also taste delicious. Now that you have everything ready, it’s time to move on to preparing the dough!
Step-by-Step Guide to Making Colorful Cookies
Now that you have all your ingredients ready, it’s time to dive into the exciting process of making colorful cookies. This step-by-step guide will walk you through each stage, from mixing the dough to baking the cookies to perfection. By following these steps carefully, you’ll create vibrant, delicious cookies that are both fun to make and delightful to eat.
Preparing the Dough
The foundation of great cookies starts with a well-made dough. This step ensures that your cookies have the perfect texture—soft, chewy, and buttery.
- Cream the Butter and Sugars – In a large mixing bowl, beat the softened butter with the granulated and brown sugars until light and fluffy. This process incorporates air into the mixture, leading to a softer texture.
- Add Eggs and Vanilla – One at a time, mix in the eggs, ensuring each one is fully incorporated before adding the next. Then, add the vanilla extract to enhance the flavor.
- Combine Dry Ingredients – In a separate bowl, whisk together the flour, baking powder, and salt. This ensures even distribution of the leavening agent, preventing any lumps in the dough.
- Mix Wet and Dry Ingredients – Gradually add the dry ingredients to the wet mixture, stirring just until combined. Overmixing at this stage can lead to dense cookies, so mix only until the dough forms.
Coloring the Dough
Adding color to your cookie dough is what makes these treats visually exciting. Follow these steps to achieve vibrant and evenly distributed colors:
- Divide the Dough – Separate the dough into equal portions based on the number of colors you want to use. For example, if making rainbow cookies, divide the dough into six equal sections.
- Add Food Coloring – Use gel food coloring for the best results, as it provides intense colors without affecting the dough’s consistency. Add a few drops to each portion and mix thoroughly until the color is evenly distributed.
- Knead Gently – If needed, knead the dough slightly to blend the color fully. However, avoid excessive mixing, as it can result in a tougher texture.
Shaping and Baking the Cookies
Now that your dough is prepared and colored, it’s time to shape and bake your cookies to perfection.
- Preheat the oven – Adjust the oven temperature to 350°F (175°C) and prepare a baking sheet by lining it with parchment paper to avoid sticking.
- Shape the Cookies – Depending on the style you want, you can:
- Roll the dough into small balls for traditional round cookies.
- Press different colored dough pieces together to create marbled or rainbow effects.
- Use cookie cutters for fun shapes.
- Add Sprinkles (Optional) – If using sprinkles, lightly press them onto the surface of the cookies before baking to ensure they stick.
- Bake – Arrange cookies on the lined baking sheet, spacing them about 2 inches apart. Bake for 10-12 minutes, or until the edges turn lightly golden while the centers stay soft.
- Cool – Let the cookies rest on the baking sheet for 3-5 minutes before transferring them to a wire rack to cool completely. which helps maintain their shape and prevents them from crumbling.
By following these steps, you’ll create beautifully colorful cookies that are as fun to make as they are to eat. The next section will cover expert tips to enhance your baking results even further!
Tips for Perfect Colorful Cookies
Baking colorful cookies is both an art and a science. While the process is fun and creative, there are a few expert tips that can take your cookies from good to great. Whether you’re aiming for vibrant colors, the perfect texture, or beautifully shaped cookies, these tips will help you achieve professional-quality results every time.
Use Gel Food Coloring for Vibrant Hues
Not all food colorings are created equal. Liquid food coloring can water down the dough, altering its consistency and requiring additional flour, which can make the cookies dry. Instead, use gel food coloring, which provides intense color without affecting the dough’s texture. A small amount of gel goes a long way, so start with a few drops and adjust as needed.
Chill the Dough to Prevent Spreading
One of the most common baking mistakes is skipping the chilling step. Refrigerating the dough for at least 30 minutes before baking helps solidify the butter, preventing the cookies from spreading too much in the oven. This step is especially important if you’re layering different colors or using cookie cutters to create intricate shapes.
Avoid Overmixing the Dough
When adding food coloring or combining dry and wet ingredients, be careful not to overmix the dough. Overmixing can lead to tough, dense cookies instead of soft, chewy ones. Mix only until the ingredients are fully incorporated to maintain a tender texture.
Experiment with Different Color Techniques
If you want to take your colorful cookies to the next level, try these creative techniques:
- Marbled Effect: Lightly fold two or more colors together without fully blending them to create a swirling, tie-dye look.
- Rainbow Layers: Stack thin layers of different colored doughs before rolling and cutting out shapes.
- Ombre Effect: Gradually mix in more food coloring to different portions of dough to create a gradient transition.
Use the Right Baking Temperature and Time
Baking at the correct temperature ensures even cooking and prevents the colors from dulling. Always preheat your oven to 350°F (175°C) and bake for 10-12 minutes until the edges are slightly golden. Overbaking can lead to dry cookies and muted colors, so check them a minute or two before the suggested time if your oven runs hot.
Let the Cookies Cool Properly
Cooling is just as important as baking. Allow the cookies to rest on the baking sheet for 3-5 minutes before transferring them to a wire rack. This prevents breakage and helps set their texture. Cooling completely before storing ensures they maintain their freshness.
Store Correctly for Long-Lasting Freshness
To keep your colorful cookies fresh and vibrant:
- Keep them fresh by storing them in an airtight container at room temperature for up to seven days.
- If layering cookies, place a piece of parchment paper between them to prevent sticking.
- For extended storage, place them in a sealed container and freeze for up to three months.
By following these tips, you’ll not only make beautiful and eye-catching cookies but also ensure they taste just as amazing as they look. Now that you have all the tricks of the trade, it’s time to start baking and get creative with your colorful cookies!
Creative Variations
One of the best things about making colorful cookies at home is the endless room for creativity. By experimenting with different colors, flavors, and decorations, you can customize your cookies for any occasion. Whether you want to celebrate a holiday, impress guests at a party, or simply have fun in the kitchen, these creative variations will help you elevate your colorful cookie game.
Rainbow Swirl Cookies
Rainbow swirl cookies are as fun to make as they are to eat. They feature a beautiful mix of vibrant colors swirled together, creating a mesmerizing effect.
How to Make Them:
- Divide and Color the Dough – Separate the dough into six equal portions and dye each one with a different color of the rainbow.
- Roll Each Color into Logs – Roll each colored dough into a thin log of the same length.
- Stack and Twist – Stack the logs on top of each other, then gently twist and fold them together to create a marbled effect.
- Slice and Bake – Roll the twisted dough into a cylinder, slice into discs, and bake as usual.
These cookies are perfect for kids’ parties, Pride celebrations, or just adding a pop of color to your day.
Ombre Effect Cookies
If you love subtle yet striking designs, ombre cookies are a great choice. These cookies transition from light to dark shades of the same color, creating a gradient effect.
How to Make Them:
- Start with One Base Color – Choose a single food coloring shade and separate the dough into three or four portions.
- Adjust the Intensity – Add more food coloring to each portion, increasing the intensity as you go.
- Layer and Shape – Stack the different shades together and roll them into a dough log or cut out shapes for a seamless ombre transition.
- Bake and Enjoy – Once baked, the gradient will appear even more distinct, creating a professional-looking design.
These cookies are great for themed events, such as weddings, baby showers, or birthday parties.
Confetti Sprinkle Cookies
Confetti cookies are colorful, cheerful, and incredibly easy to make. By adding sprinkles to the dough, you can create a funfetti effect that bursts with color in every bite.
How to Make Them:
- Mix the Dough as Usual – Prepare the sugar cookie dough following the standard recipe.
- Add Sprinkles – Fold in about ½ cup of rainbow sprinkles to the dough, making sure they are evenly distributed.
- Shape and Bake – Form dough balls and slightly flatten them before baking.
- Extra Decoration – Roll the dough balls in extra sprinkles before baking for an even more colorful finish.
These cookies are perfect for birthdays, celebrations, or anytime you want to add a little extra joy to your baking.
Chocolate-Dipped Colorful Cookies
For an extra indulgent twist, dip your colorful cookies in chocolate. The combination of vibrant colors and rich chocolate makes these cookies both stunning and delicious.
How to Make Them:
- Bake Your Colorful Cookies – Prepare any colorful cookie variation and let them cool completely.
- Melt the Chocolate – Use white, dark, or milk chocolate and melt it in a microwave-safe bowl. For extra creativity, tint white chocolate with gel food coloring.
- Dip the Cookies – Dip half of each cookie into the melted chocolate and place them on a parchment-lined tray.
- Decorate – Before the chocolate hardens, sprinkle crushed nuts, mini sprinkles, or edible glitter on top.
- Let Set – Allow the chocolate to fully harden before serving or storing.
These cookies make elegant gifts or dessert table showstoppers for special events.
Holiday-Themed Colorful Cookies
Why not tailor your colorful cookies to match the season? With a little creativity, you can make festive cookies for any holiday.
Holiday Ideas:
- Christmas: Use red and green dough swirls or shape cookies into stars and trees.
- Halloween: Make orange and black marbled cookies or use spooky cookie cutters.
- Easter: Use pastel shades and shape cookies into eggs, bunnies, or flowers.
- Valentine’s Day: Make pink and red heart-shaped cookies with a drizzle of white chocolate.
With these creative variations, you can transform a simple cookie recipe into something unique and exciting. Whether you prefer bold rainbow swirls, elegant ombre shades, or festive holiday treats, there’s always a new way to experiment with colorful cookies. Happy baking!
Frequently Asked Questions (FAQ)
Making colorful cookies at home is a fun and rewarding experience, but you might have some questions along the way. Below are answers to some of the most common questions to help you troubleshoot issues, enhance your baking skills, and get the most vibrant results possible.
What type of food coloring works best for colorful cookies?
The best food coloring for making colorful cookies is gel food coloring. Unlike liquid food coloring, which can water down the dough and affect its consistency, gel-based food coloring provides more intense colors without altering the texture.
- Recommended Brands: AmeriColor, Wilton, and Chefmaster are popular choices that produce vibrant results.
- How to Use: Start with a small amount and gradually add more to achieve the desired shade. A toothpick can help control the amount.
- Alternative: Powdered food coloring can also be used, especially if you want ultra-bright colors, but it requires thorough mixing.
For best results, avoid natural food colorings, as they tend to produce muted shades rather than bold, vibrant colors.
How can I prevent my cookies from spreading too much in the oven?
Cookie dough spreading can be frustrating, but there are several ways to prevent it:
- Chill the Dough – Refrigerating the dough for at least 30 minutes before baking helps solidify the butter, preventing excessive spreading.
- Use the Right Butter – Make sure your butter is softened, not melted when mixing the dough. Melted butter leads to cookies that spread too thin.
- Measure Ingredients Accurately – Too much sugar or too little flour can affect the dough’s structure. Use a kitchen scale for precise measurements.
- Avoid Overmixing – Overworking the dough can incorporate too much air, causing cookies to spread more while baking.
- Check the Baking Sheet – Using a non-greased, parchment-lined baking sheet prevents cookies from spreading too much. Silicone baking mats can also help.
By following these tips, your cookies will hold their shape beautifully while staying soft and chewy.
Can I freeze the cookie dough for later use?
Yes! Freezing cookie dough is a great way to save time and have freshly baked cookies whenever you want. Here’s how:
- For Pre-Portioned Dough: Scoop the dough into balls and place them on a baking sheet. Freeze until firm, then transfer to a zip-top bag or airtight container. Label with the date and freeze for up to 3 months.
- For Rolled Dough: Roll out the dough, cut into shapes, and freeze the cutouts in a single layer before stacking them between parchment paper in an airtight container.
- Baking from Frozen: No need to thaw! Just bake the frozen dough balls as usual, adding 1-2 extra minutes to the baking time.
This method is perfect for busy schedules, holiday baking, or whenever you crave fresh homemade cookies on demand.
How do I store colorful cookies to keep them fresh?
Proper storage is key to keeping your colorful cookies fresh and maintaining their vibrant colors.
- Room Temperature: Store in an airtight container at room temperature for up to one week. If stacking cookies, place a sheet of parchment paper between layers to prevent sticking.
- Refrigeration: Not recommended, as it can dry out the cookies. However, if needed, store in an airtight container for up to two weeks.
- Freezing: Fully baked cookies can be frozen for up to 3 months in a freezer-safe container. When ready to eat, let them thaw at room temperature for about 15 minutes.
To maintain the best taste and texture, avoid exposing the cookies to direct sunlight or heat, as this can cause the colors to fade.
Conclusion
Making colorful cookies at home is a fun, creative, and rewarding experience that brings joy to both the baker and those who get to enjoy the treats. By using the right ingredients, following the proper techniques, and experimenting with different colors and designs, you can create cookies that are not only visually stunning but also delicious. Whether you’re making them for a special occasion, a holiday, or just for fun, the process allows you to express your creativity and make something truly unique.
With the tips and variations covered in this guide, you now have all the knowledge you need to perfect your colorful cookies. From using gel food coloring for vibrant hues to chilling the dough for the best texture, every small detail can make a big difference in the final result. So, gather your ingredients, unleash your creativity, and start baking! No matter which variation you choose, the most important part is to have fun and enjoy the delicious, colorful cookies you’ve made.