Imagine this—you’ve had a long day, your energy is dipping, and your sweet tooth is calling. You could reach for a sugar-laden store-bought snack, but you hesitate. You want something indulgent yet nourishing, something that won’t derail your health goals. That’s where homemade protein cookies come in.
These delicious treats are more than just cookies; they are fuel for your body. Whether you’re looking to build muscle, maintain a balanced diet, or simply enjoy a guilt-free snack, making your own protein cookies at home is the way to go. Not only are they simple to make, but they also allow you to control what goes into them. Say goodbye to artificial additives and excess sugars—you’re about to discover how to make the perfect batch of protein-packed goodness.
Table of Contents
Why Choose Homemade Protein Cookies?
Health Benefits of Protein Cookies
When it comes to snacking, you want something that not only tastes good but also benefits your body. Here’s why homemade protein cookies should be your go-to option:
- Supports Muscle Growth – Protein is essential for muscle repair and growth, making these cookies ideal for post-workout recovery.
- Keeps You Full Longer – Unlike sugary snacks that cause energy crashes, protein cookies provide lasting satiety.
- Nutrient-Dense Ingredients – They are packed with fiber, healthy fats, and protein while being low in refined sugar.
- Boosts Metabolism – Protein has a higher thermic effect, meaning your body burns more calories digesting it compared to carbs or fats.
Cost-Effective & Customizable
- Save Money – Pre-packaged protein snacks can be expensive. Making your own allows you to get more for your money.
- Dietary Flexibility – You control what goes into them—gluten-free, dairy-free, keto, or vegan? No problem!
- Flavor Variety – Experiment with different protein powders, sweeteners, and mix-ins to suit your taste.
Key Ingredients for Protein Cookies
| Ingredient | Health Benefit | Possible Substitutes |
|---|---|---|
| Protein powder | Supports muscle recovery | Whey, casein, plant-based |
| Oats | High in fiber, aids digestion | Almond flour, coconut flour |
| Nut butter | Healthy fats, adds creaminess | Peanut butter, almond butter |
| Honey/Maple Syrup | Natural sweetness, energy boost | Stevia, monk fruit sweetener |
| Eggs/Flax Eggs | Binds ingredients, protein source | Chia egg, banana |
| Dark Chocolate Chips | Rich in antioxidants | Cacao nibs, sugar-free chocolate |
Each ingredient plays a crucial role in delivering both taste and nutrition. Now, let’s move on to making your cookies!
Step-by-Step Guide – How to Make Protein Cookies at Home
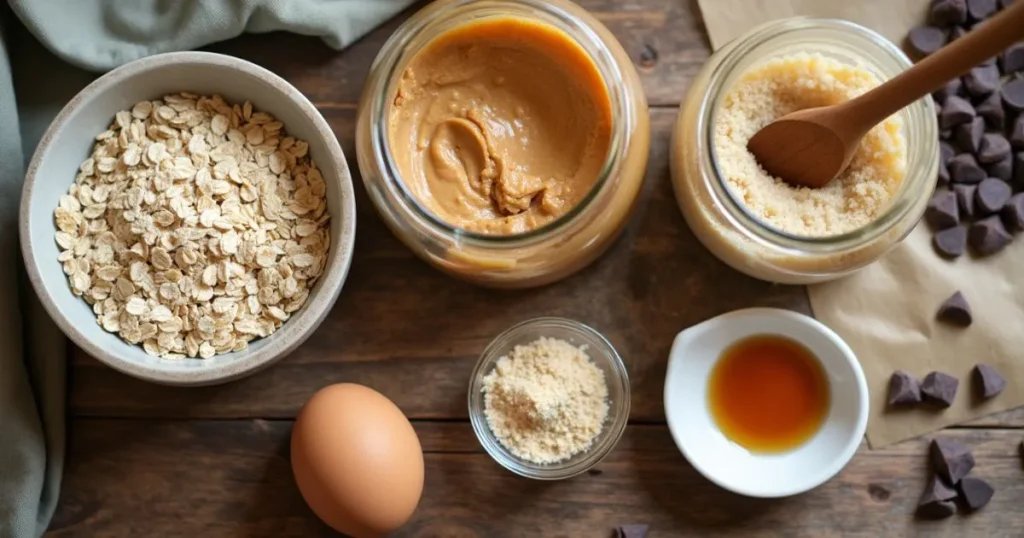
Step 1: Gather Your Ingredients
Before you begin, make sure you have all the necessary ingredients ready:
- 1 cup oats (or almond flour for a low-carb option)
- 1/2 cup protein powder of your choice
- 1/4 cup nut butter (peanut, almond, or cashew)
- 1/4 cup honey or maple syrup
- 1 egg (or a flaxseed egg for a plant-based option)
- 1/2 teaspoon baking powder
- 1 teaspoon vanilla extract
- 1/4 cup dark chocolate chips or cacao nibs
- A pinch of salt
Having everything pre-measured and set up makes the process much smoother and prevents any last-minute scrambling.
Step 2: Mix the Dry Ingredients
- In a large mixing bowl, combine oats, protein powder, baking powder, and a pinch of salt.
- Use a whisk or spoon to mix thoroughly, ensuring that the protein powder is evenly distributed.
- If you want a finer texture, pulse the oats in a food processor before mixing them in.
Step 3: Prepare the Wet Ingredients
- In a separate bowl, add nut butter, honey (or maple syrup), egg (or flax egg), and vanilla extract.
- Use a whisk or hand mixer to blend everything together until smooth and creamy.
- If your nut butter is too thick, you can microwave it for 10-15 seconds to make it easier to mix.
Step 4: Combine and Form the Dough
- Slowly pour the wet ingredients into the bowl with the dry ingredients, stirring continuously with a spatula or wooden spoon.
- The dough should begin to thicken as you mix. If it feels too dry, add a splash of almond milk or water, one teaspoon at a time, until the consistency is just right.
- Once the dough is well combined, fold in the dark chocolate chips or any other mix-ins like chopped nuts or dried fruit.
- Using your hands, roll the dough into small balls (about 1-1.5 inches in diameter) and gently flatten them into cookie shapes on the baking sheet.
Step 5: Bake to Perfection
- Preheat your oven to 350°F (175°C).
- Line a baking sheet with parchment paper to prevent sticking and make cleanup easier.
- Place the cookies on the sheet, leaving at least 1 inch of space between them.
- Bake for 10-12 minutes, checking for golden brown edges. Avoid overbaking, as protein cookies tend to dry out faster than traditional ones.
- If you prefer a slightly chewy texture, remove them from the oven when they still look a little soft in the center.
Step 6: Cool and Enjoy!
- Let the cookies rest on the baking sheet for about 5 minutes before transferring them to a wire rack to cool completely.
- Cooling allows the cookies to firm up while still maintaining a soft and chewy center.
- After cooling, keep them in an airtight container at room temperature for up to a week, or refrigerate to extend their freshness.
- You can also freeze them in a ziplock bag and thaw as needed for a convenient snack.
Now you have a batch of delicious, nutritious protein cookies ready to be enjoyed whenever you need an energy boost!
Pro Tips for the Best Protein Cookies
- Use high-quality protein powder – A good-tasting powder will enhance the flavor of your cookies.
- Don’t overbake – Protein cookies can dry out quickly. Remove them once the edges turn golden.
- Customize your mix-ins – Add nuts, coconut flakes, or cinnamon for an extra flavor boost.
- Store properly – Keep them in an airtight container for freshness.
Common Mistakes to Avoid
- Adding too much protein powder – This can result in a dry, chalky texture.
- Skipping a binding ingredient – Eggs or flax eggs help hold everything together.
- Overmixing the dough – Can make the cookies dense and tough.
- Baking too long – Protein cookies harden as they cool, so remove them on time.
FAQs About Homemade Protein Cookies
Can I make protein cookies without protein powder?
Yes! You can boost protein content naturally by using almond flour, oats, or nut butter.
How do I make my protein cookies softer?
Adding more nut butter or mashed banana keeps them moist and chewy.
Can I freeze protein cookies?
Absolutely! Store them in an airtight container and freeze for up to 3 months.
What’s the best type of protein powder to use?
Whey, casein, or plant-based protein works well. Avoid powders with artificial sweeteners for a better taste.
Are these cookies keto-friendly?
Yes! Swap oats for almond flour and use a low-carb sweetener like erythritol.
Conclusion: Enjoy Guilt-Free Snacking!
You don’t have to give up sweet treats to stay on track with your fitness goals. By making your own protein cookies, you get to enjoy delicious, nutritious snacks tailored to your preferences. Whether you need a pre-workout energy boost, a post-workout recovery snack, or just a satisfying treat, these homemade protein cookies are the perfect choice.
Now it’s your turn—gather your ingredients, whip up a batch, and enjoy every bite! Have a favorite protein cookie variation? We’d love to hear from you—drop your thoughts and experiences in the comments section! Happy baking!