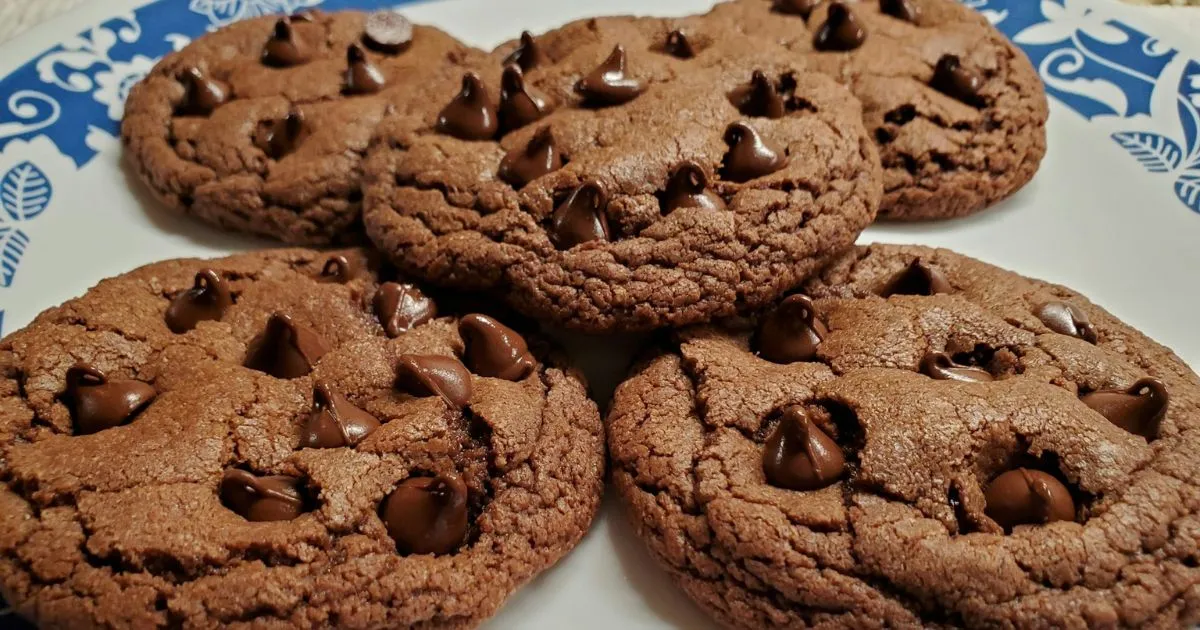
There’s something undeniably comforting about the warm, buttery aroma of freshly baked chocolate chip cookies filling your kitchen. These classic treats have been a household favorite for generations, evoking childhood memories, cozy family gatherings, and late-night indulgences. Whether you’re baking for a special occasion, treating yourself after a long day, or simply craving something sweet, a batch of homemade chocolate chip cookies is always a good idea.
But what truly makes the best chocolate chip cookies? Is it the perfect balance of chewiness and crispiness? The rich, deep flavor of high-quality chocolate? Or perhaps the secret lies in using just the right mix of ingredients and techniques to achieve that bakery-style texture at home?
In this easy-to-follow guide, we’ll break down the secrets behind baking the ultimate chocolate chip cookies. From ingredient selection to expert baking techniques, you’ll learn everything you need to create a flawless batch every time. Whether you prefer your cookies soft and chewy, crispy and golden, or somewhere in between, this guide will help you achieve your perfect cookie.
Get ready to bake, because once you master this recipe, you may never go back to store-bought cookies again!
Table of Contents
Ingredients for the Best Chocolate Chip Cookies
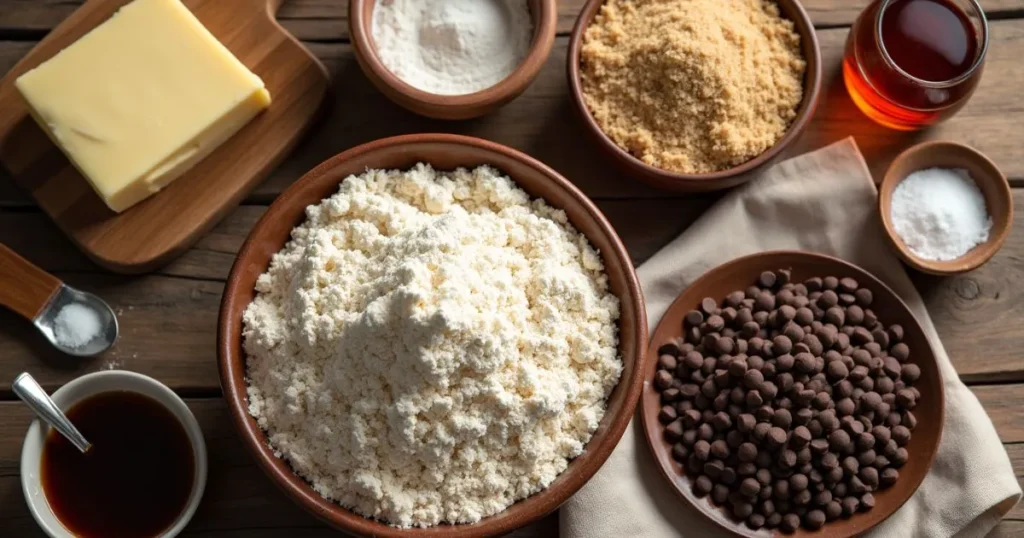
The foundation of the great chocolate chip cookies starts with high-quality ingredients. While the basic recipe may seem simple, each component plays a crucial role in achieving the perfect balance of flavor, texture, and structure. Understanding how these ingredients work together will help you fine-tune your cookies to your exact preference—whether you love them chewy, crispy, or somewhere in between.
Below is a breakdown of the essential ingredients, along with tips on how to choose the best versions for superior results.
Chocolate Chip Cookies Ingredients Table
| Ingredient | Quantity | Role in the Recipe |
|---|---|---|
| All-purpose flour | 2 1/4 cups | Provides structure and stability to the cookies |
| Baking soda | 1 teaspoon | Acts as a leavening agent, helping cookies rise and spread properly |
| Salt | 1/2 teaspoon | Enhances overall flavor and balances sweetness |
| Unsalted butter | 1 cup (2 sticks) | Adds richness, moisture, and contributes to the cookie’s soft texture |
| Brown sugar | 3/4 cup | Creates a chewy texture and adds a deep, caramel-like flavor |
| Granulated sugar | 3/4 cup | Helps with spreading and crisp edges |
| Eggs | 2 large | Binds ingredients together and adds moisture |
| Vanilla extract | 2 teaspoons | Enhances the flavor profile with warm, aromatic notes |
| Chocolate chips | 2 cups | The star ingredient—choose semi-sweet, dark, or milk chocolate based on preference |
Ingredient Selection Tips
- Flour Matters
- All-purpose flour is the most commonly used, but for a softer texture, you can replace part of it with cake flour.
- Measure flour correctly using the spoon & level method (scoop flour into the measuring cup and level it off) to avoid dry cookies.
- Butter: The Key to Richness
- Unsalted butter allows better control over the salt content.
- Let butter soften at room temperature before mixing—it should be soft but not melted. Melted butter results in cookies that spread too thin.
- The Sugar Ratio Affects Texture
- Brown sugar contains molasses, adding moisture and chewiness.
- Granulated sugar encourages spreading and crispy edges.
- A higher ratio of brown sugar to white sugar leads to chewier cookies, while more white sugar creates a crispier texture.
- Eggs Bring Moisture and Structure
- Use room-temperature eggs for better incorporation.
- Adding an extra egg yolk can create a richer, chewier texture.
- The Best Chocolate for Cookies
- Semi-sweet chocolate chips offer the perfect balance of sweetness and bitterness.
- For a more gourmet experience, use chocolate chunks or chopped dark chocolate, which melt more evenly.
- Mixing different types of chocolate (milk, dark, white) adds complexity to the flavor.
- A Touch of Salt Enhances Flavor
- Salt enhances the chocolate flavor while balancing the sweetness.
- To elevate the flavor, sprinkle flaky sea salt on top before baking.
By carefully choosing and adjusting these ingredients, you can customize your chocolate chip cookies to achieve your desired texture and taste. Now that we’ve covered the building blocks, let’s move on to the step-by-step process of bringing them all together!
Step-by-Step Guide: How to Make the Best Chocolate Chip Cookies
Now that you understand the key ingredients and their roles, it’s time to bring everything together to bake the perfect batch of chocolate chip cookies. Follow this step-by-step guide to ensure your cookies turn out delicious every time. Whether you like them soft and chewy, crisp and golden, or thick and gooey, these steps will help you achieve bakery-level results right in your own kitchen.
1. Prepare Your Ingredients
Before you start mixing, it’s important to have everything measured and ready.
- Preheat the oven to 350°F (175°C) to ensure even baking.
- Line a baking sheet with parchment paper or a silicone mat to prevent sticking.
- Measure all ingredients accurately, especially the flour (using the spoon & level method) to prevent dry cookies.
- Allow butter and eggs to reach room temperature for a smoother, well-blended dough.
2. Mix the Dry Ingredients
- In a medium mixing bowl, whisk together the following ingredients:
- 2 1/4 cups all-purpose flour
- 1 teaspoon baking soda
- 1/2 teaspoon salt
- Set aside. This step ensures the leavening agents are evenly distributed, promoting consistent baking results.
3. Cream the Butter and Sugars
- In a large mixing bowl, use a hand or stand mixer to beat together:
- 1 cup unsalted butter (softened)
- 3/4 cup brown sugar
- 3/4 cup granulated sugar
- Beat for 2-3 minutes until the mixture turns light and fluffy.
- Creaming the butter properly introduces air, resulting in cookies that are soft and slightly risen.
4. Add Wet Ingredients
- Mix in 2 large eggs one at a time, beating well after each addition.
- Stir in 2 teaspoons of vanilla extract for enhanced flavor.
- Scrape down the sides of the bowl to ensure all ingredients are well combined.
5. Combine Wet and Dry Ingredients
- Gradually incorporate the flour mixture into the wet ingredients, mixing on low speed.
- Stir just until the flour disappears—overmixing will lead to tough cookies.
- The dough should be slightly sticky but hold its shape when scooped.
6. Fold in the Chocolate Chips
- Using a spatula, gently fold in 2 cups of chocolate chips (or a mix of chocolate chunks and chips for a variety of textures).
- If you like extra chocolate, press a few chips on top of each dough ball before baking.
- For an even richer flavor, consider chilling the dough for 30 minutes to 24 hours before baking. This helps deepen the flavors and prevents the cookies from spreading too much.
7. Scoop and Shape the Dough
- Use a cookie scoop or a tablespoon to portion out dough balls.
- Place them on the prepared baking sheet, leaving 2 inches of space between each cookie to allow for spreading.
8. Bake to Perfection
- Bake in the preheated oven (350°F/175°C) for 9-11 minutes or until the edges are lightly golden but the centers still look soft.
- Remember, cookies will continue baking slightly on the hot baking sheet even after being removed from the oven.
Baking time variations:
- Chewy cookies: Remove at 9 minutes while the center is slightly underbaked.
- Crispy cookies: Bake for 11-12 minutes until golden brown all over.
9. Let Cool and Enjoy!
- Allow cookies to cool on the baking sheet for 5 minutes before transferring them to a wire rack.
- Let them cool completely if you want firmer cookies, or enjoy them warm for a gooey, melty texture.
Pro Tips for Success
- For thicker cookies, chill the dough for at least 30 minutes before baking (or overnight for enhanced flavor).
- Use a mix of chocolate chips and chunks for pockets of melted chocolate throughout.
- Sprinkle flaky sea salt on top for a gourmet touch that enhances the chocolate flavor.
- Experiment with mix-ins like nuts, coconut, or toffee for added texture.
By following this step-by-step guide, you’ll be able to bake the perfect chocolate chip cookies that are rich, chewy, and irresistibly delicious. Now, let’s dive into some expert tips to take your cookies to the next level!
Expert Tips for the Best Chocolate Chip Cookies
Even the simplest cookie recipe can be elevated with a few expert techniques. Small adjustments in ingredients, mixing methods, and baking techniques can significantly impact the texture, flavor, and overall quality of your cookies. Here are five expert tips to help you bake the absolute best chocolate chip cookies every time.
1. Use High-Quality Ingredients for the Best Flavor
The quality of your ingredients significantly impacts the taste and texture of your cookies.
- Butter: Opt for high-fat European-style butter (82% fat content or higher) for a richer taste and smoother texture.
- Chocolate: Instead of regular chocolate chips, try chopped high-quality chocolate bars for pools of melted chocolate in every bite.
- Vanilla Extract: Pure vanilla extract enhances the depth of flavor—avoid artificial vanilla, which can taste synthetic.
- Eggs & Flour: Use fresh eggs and unbleached all-purpose flour for the best results.
Using the best ingredients may seem like a small detail, but it makes a noticeable difference in the final cookies.
2. Don’t Overmix the Dough
Overmixing is one of the most common mistakes in cookie baking. When flour is mixed too much, it develops gluten, which can make cookies tough instead of soft and tender.
- After adding the dry ingredients, mix just until the flour disappears—no longer than necessary.
- If using a stand mixer, switch to low speed when incorporating the dry ingredients.
- If folding in chocolate chips by hand, use a gentle folding motion instead of vigorous stirring.
This simple trick ensures your cookies stay soft and chewy instead of becoming dense and bread-like.
3. Chill the Dough for Better Texture and Flavor
Chilling the dough before baking does two important things:
- Enhances flavor: Allowing the dough to rest for at least 30 minutes to 24 hours deepens the flavors, as the ingredients have more time to meld together.
- Controls spreading: Cold dough spreads less in the oven, resulting in thicker cookies with a more defined texture.
Pro tip: If you’re short on time, scoop out your cookie dough balls before chilling, so they’re ready to go straight into the oven once they’ve rested.
4. Use Parchment Paper or Silicone Baking Mats
The surface you bake on can impact how your cookies turn out.
- Parchment paper prevents cookies from sticking and allows for even baking.
- Silicone baking mats (Silpats) create a slightly different result, yielding chewier cookies with a well-browned bottom.
- Avoid greasing baking sheets—extra butter or oil can cause the cookies to spread too much.
Using the right baking surface ensures your cookies bake evenly and maintain their ideal texture.
5. Adjust Baking Time Based on Your Preference
Baking time plays a huge role in determining whether your cookies turn out soft and chewy or crispy and golden.
- For soft and gooey cookies, bake for 9-10 minutes—the edges should be golden, but the center should still look slightly underbaked.
- For crispier cookies, bake for 11-12 minutes, until the entire surface has a golden-brown hue.
- For extra chewy cookies, remove them from the oven earlier and let them cool completely on the baking sheet.
Cookies will continue to set as they cool, so even if they look slightly underdone, they’ll firm up beautifully after a few minutes of resting.
By following these expert tips, you can fine-tune your baking process and achieve the perfect batch of chocolate chip cookies every single time.
Common Mistakes to Avoid
Even experienced bakers can run into issues when making chocolate chip cookies. Small missteps in measuring, mixing, or baking can result in cookies that are too flat, too hard, or lacking in flavor. To ensure your cookies turn out perfect every time, here are five common mistakes to avoid—along with how to fix them.
1. Using Warm or Melted Butter Instead of Softened Butter
Butter temperature plays a crucial role in cookie texture.
- Warm or melted butter causes cookies to spread too much, resulting in thin, greasy cookies.
- Cold butter won’t incorporate properly, leading to dense dough and unevenly mixed ingredients.
- The right way: Use softened butter at room temperature—it should be soft enough to press with your finger but not melted. If you need to soften butter quickly, cut it into small cubes and let it sit for 15-20 minutes.
2. Measuring Flour Incorrectly
Too much or too little flour can drastically affect your cookies.
- Too much flour results in dry, cakey cookies that don’t spread properly.
- Too little flour causes the cookies to spread too much and become overly thin.
- The right way: Use the spoon and level method—fluff up the flour, spoon it into the measuring cup, and level it off with a knife. Avoid scooping directly with the cup, as this packs in too much flour.
3. Overmixing the Dough
Mixing the dough too much can ruin the texture of your cookies.
- Overmixing after adding flour activates the gluten, making cookies tough and dense instead of soft and tender.
- The right way: Mix just until the flour disappears and no more. If using a stand mixer, stop as soon as the ingredients are combined.
4. Baking on a Hot or Greased Baking Sheet
The surface you bake on affects how your cookies spread and bake.
- A hot baking sheet (especially if reusing from a previous batch) causes the butter in the dough to melt too quickly, leading to thin, flat cookies.
- Greased baking sheets add extra oil, making the cookies spread more than they should.
- The right way: Always start with a room-temperature baking sheet lined with parchment paper or a silicone baking mat for the best results.
5. Overbaking the Cookies
Many bakers make the mistake of waiting until cookies look fully baked before taking them out of the oven.
- Overbaking leads to dry, hard cookies because cookies continue to cook on the baking sheet after being removed from the oven.
- The right way: Take cookies out when the edges are golden but the centers still look slightly underbaked. Let them cool on the baking sheet for 5 minutes, where they’ll firm up to the perfect texture.
By avoiding these common mistakes, you’ll be well on your way to baking consistently delicious, bakery-quality chocolate chip cookies!
Variations and Customizations
One of the best things about chocolate chip cookies is how versatile they are! With a few simple tweaks, you can customize the flavor, texture, and mix-ins to create cookies that suit your personal taste. Whether you love extra gooey cookies, unique flavor combinations, or dietary-friendly options, here are five delicious ways to switch things up.
1. Chewy vs. Crispy: Adjusting Texture to Your Preference
The texture of your cookies depends on ingredient ratios and baking techniques.
- For soft and chewy cookies:
- Use more brown sugar than white sugar for extra moisture.
- Add an extra egg yolk for richness and chewiness.
- Slightly underbake the cookies (remove them from the oven when the centers still look slightly underdone).
- For thin and crispy cookies:
- Use more granulated sugar than brown sugar to encourage spreading.
- Melt the butter before mixing for a thinner dough.
- Bake at a slightly higher temperature (375°F/190°C) for crispier edges.
2. Chocolate Chip Alternatives for a Flavor Boost
Chocolate chips are the classic choice, but swapping them out (or mixing in different types) can take your cookies to the next level.
- Dark chocolate chunks: Rich and intense flavor with a sophisticated touch.
- Milk chocolate chips: Sweeter and creamier, perfect for a classic taste.
- White chocolate chips: A smooth, buttery sweetness that pairs well with macadamia nuts.
- Peanut butter chips: A nutty, savory contrast to the sweet cookie dough.
- Caramel or toffee bits: Add a rich, buttery crunch for extra texture.
- Mix and match: Use a combination of chocolates for more depth of flavor (e.g., dark + milk chocolate).
3. Nutty Additions for Crunch and Flavor
Adding nuts to your cookies provides a satisfying crunch and a complementary flavor to the sweet dough. Some great options include:
- Walnuts: A classic choice that adds earthy richness.
- Pecans: Slightly buttery and softer than walnuts.
- Macadamia nuts: Pair beautifully with white chocolate for a tropical twist.
- Almonds: Light, slightly sweet, and great for a crunchy texture.
- Hazelnuts: Give cookies a Nutella-like flavor when paired with chocolate.
Pro tip: Lightly toast the nuts before adding them to the dough for enhanced flavor and crispiness.
4. Fun Flavor Twists and Unique Mix-Ins
For those who love experimenting, try adding unique ingredients to put a creative spin on your cookies:
- Espresso powder: deepens the chocolate flavor without adding a coffee taste.
- Cinnamon or nutmeg: Adds a warm, spiced twist, perfect for fall-inspired cookies.
- Orange zest: A bright, citrusy contrast to rich chocolate.
- Shredded coconut: Gives cookies a chewy texture and tropical taste.
- Mini marshmallows: Create gooey, s’mores-like cookies when paired with chocolate and graham cracker crumbs.
5. Dietary-Friendly Options (Gluten-Free, Vegan, and Keto)
If you have dietary restrictions, you don’t have to miss out on delicious cookies! Here’s how to adjust the recipe:
- Gluten-Free Cookies:
- Substitute 1:1 gluten-free all-purpose flour for regular flour.
- Add 1 teaspoon of xanthan gum if your flour blend doesn’t include it—this helps bind the dough.
- Vegan Cookies:
- Replace butter with vegan butter or coconut oil.
- Swap eggs with flax eggs (1 tablespoon ground flaxseed + 3 tablespoons water per egg).
- Opt for dairy-free chocolate chips such as Enjoy Life or Hu Kitchen.
- Keto/Low-Carb Cookies:
- Use almond flour or coconut flour instead of all-purpose flour.
- Replace sugar with monk fruit sweetener or erythritol.
- Opt for sugar-free chocolate chips to keep it low-carb.
With these customizations, you can create the perfect chocolate chip cookies that suits your taste and dietary needs!
Frequently Asked Questions (FAQ)
Chocolate chip cookies are a beloved classic, but many home bakers have questions about how to get them just right. From achieving the perfect texture to troubleshooting common baking issues, here are answers to some of the most frequently asked questions about making the best chocolate chip cookies.
1. How Do I Keep My Cookies Soft and Chewy for Days?
Nothing beats the taste of fresh, soft, and chewy chocolate chip cookies, but they can sometimes harden after a day or two. Here’s how to keep them fresh longer:
- Store cookies in an airtight container at room temperature to prevent them from drying out.
- Place a slice of bread in the container—the cookies will absorb the moisture from the bread, staying soft longer.
- Use brown sugar in the dough, as it retains moisture better than granulated sugar.
- Slightly underbake your cookies, removing them from the oven when they still look slightly soft in the center.
If your cookies have already hardened, you can microwave them for 10 seconds to bring back some softness!
2. Why Did My Cookies Turn Out Flat?
Flat cookies can be disappointing, but there are several reasons this might happen:
- Butter was too warm or melted—always start with room-temperature softened butter.
- Not enough flour—make sure to measure your flour correctly using the spoon and level method.
- Skipping the chilling step—chilling the dough for at least 30 minutes helps prevent excessive spreading.
- Overmixing the dough—this can break down the butter and aeration, leading to flatter cookies.
- Baking on a hot cookie sheet—always let baking sheets cool between batches to prevent premature spreading.
If your cookies are spreading too much, try adding 1-2 tablespoons of extra flour to the dough next time.
3. Can I Make the Dough Ahead of Time?
Yes! Making cookie dough ahead of time can actually improve the flavor and texture.
- Refrigerating the dough (up to 72 hours) allows the flavors to develop, resulting in richer cookies.
- Freezing cookie dough allows you to enjoy fresh cookies anytime.
- Arrange dough balls on a baking sheet and freeze until firm.
- Transfer them to a zip-top bag and freeze for up to 3 months.
- When ready to bake, place frozen dough balls on a baking sheet and bake as usual, adding 1-2 extra minutes to the baking time.
4. What’s the Best Way to Make My Cookies Extra Thick?
For bakery-style thick cookies, try these tips:
- Chill the dough—cold dough spreads less, leading to thicker cookies.
- Use extra egg yolks—they add richness and help the cookies stay thick.
- Scoop larger dough balls—using a 2-tablespoon or 3-tablespoon scoop creates taller cookies.
- Stack the dough—instead of forming perfect balls, shape dough into taller mounds.
- Use a higher baking temperature—baking at 375°F (190°C) instead of 350°F can help the cookies set faster, keeping them thick.
5. Can I Substitute Ingredients in My Cookie Recipe?
Yes! There are many ingredient swaps you can make based on dietary needs or what you have on hand.
- Butter substitute: Use coconut oil or vegan butter for a dairy-free version.
- Egg substitute: Replace eggs with flax eggs (1 tablespoon flaxseed meal + 3 tablespoons water per egg) for a vegan option.
- Flour substitute: Use a 1:1 gluten-free baking flour to make gluten-free cookies.
- Sugar substitute: Swap granulated sugar for coconut sugar or a sugar-free alternative like monk fruit sweetener for a lower-sugar version.
- Chocolate substitute: Use dark chocolate, white chocolate, peanut butter chips, or even chopped candy bars instead of classic chocolate chips.
With these simple swaps, you can customize your cookies without sacrificing taste or texture.
By addressing these common questions, you’ll have all the knowledge you need to bake perfect chocolate chip cookies every time!
Conclusion
Mastering the perfect chocolate chip cookies comes down to the right ingredients, techniques, and a little patience. Whether you love them chewy, crispy, or packed with extra chocolate, this recipe is easy to customize to your preference. Follow these expert tips, avoid common mistakes, and enjoy warm, homemade cookies every time. Happy baking!